Creating custom nameservers with WHM and NameCheap
This is a how-to from one of my old projects (HostWoot). This still applies today so I thought it would be best to immortalise the post here on this blog!
This tutorial will explain how to create custom nameservers when using WHM in combination with NameCheap.
The content below is from the old HostWoot forums: here (link removed, page no longer exists).
Step 1:
Find the IP address of the server you are hosted on.
Server 1 (SHARED): 67.23.235.84 (this server no longer exists, this serves as an example)
Server 2 (FFMPEG): 174.142.3.65 (this server no longer exists, this serves as an example)
Step 2:
Login to your WHM panel
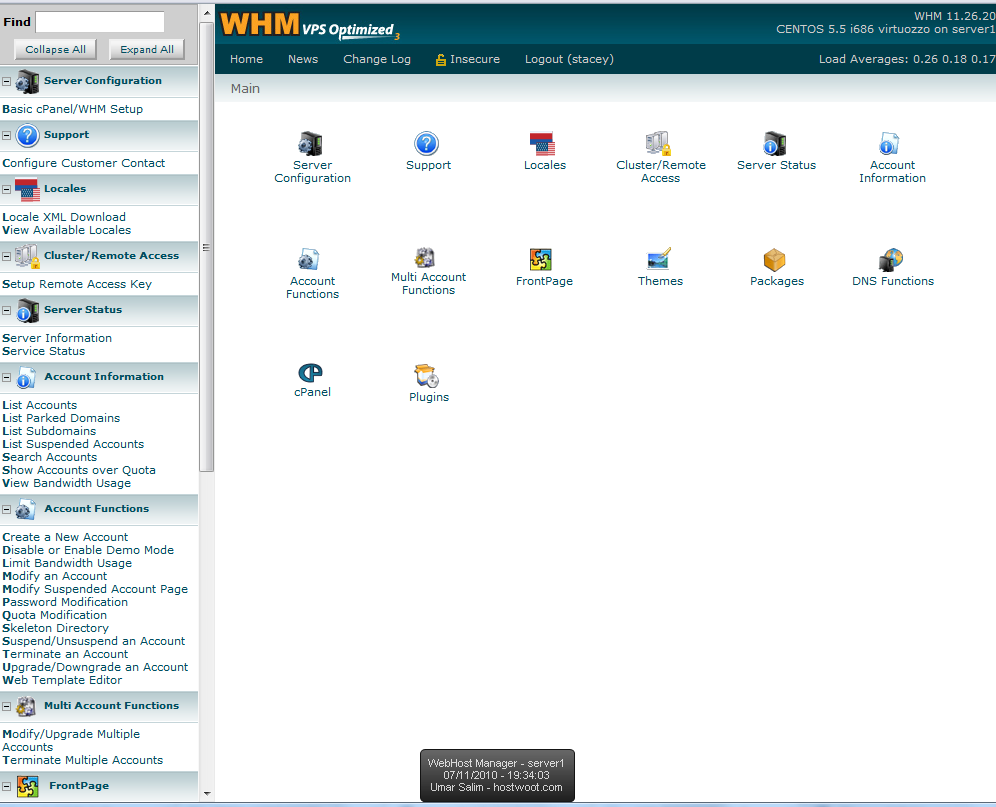
When you log in, it will look like so;
Click on the following button;
Step 3:
Change the details on the page that appears to the nameservers you wish to use.
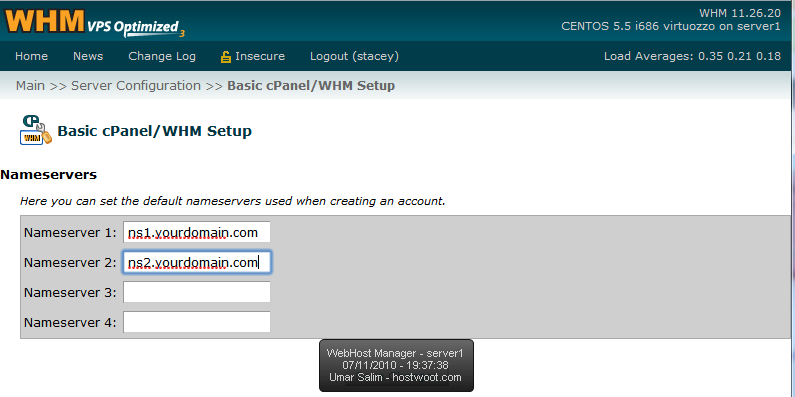
Then click “Save Changes”. This will create A name records on the SERVER for you.
You must now create A name records on your domain site, in this example we are using NameCheap.
So we log into NameCheap and click on the domain we wish to modify. We then click “Nameserver Registration” and we then get taken to this page;
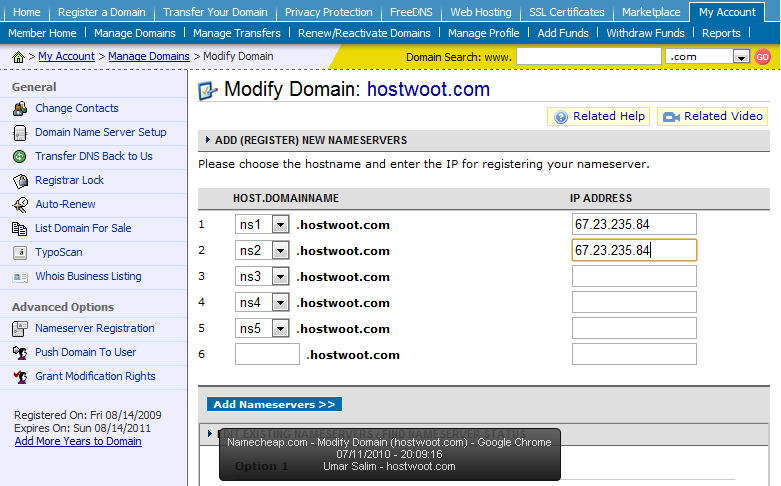
Here is where we type the nameserver IP we got above.
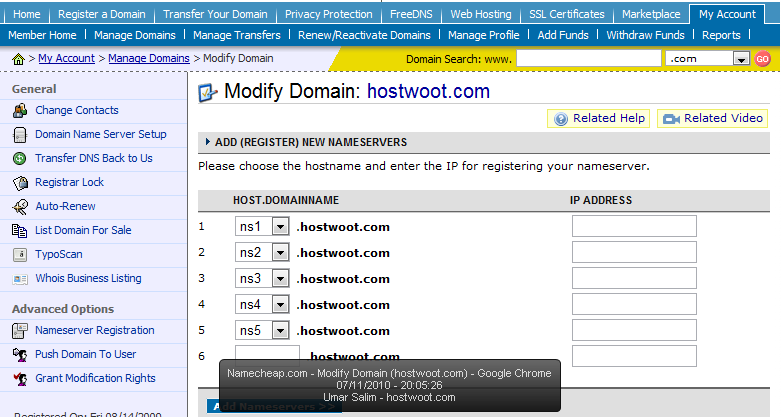
Then click “Add Nameservers”.
Step 5:
Change your nameservers to the ones you created and wait 24 hours.
I hope this tutorial helps!